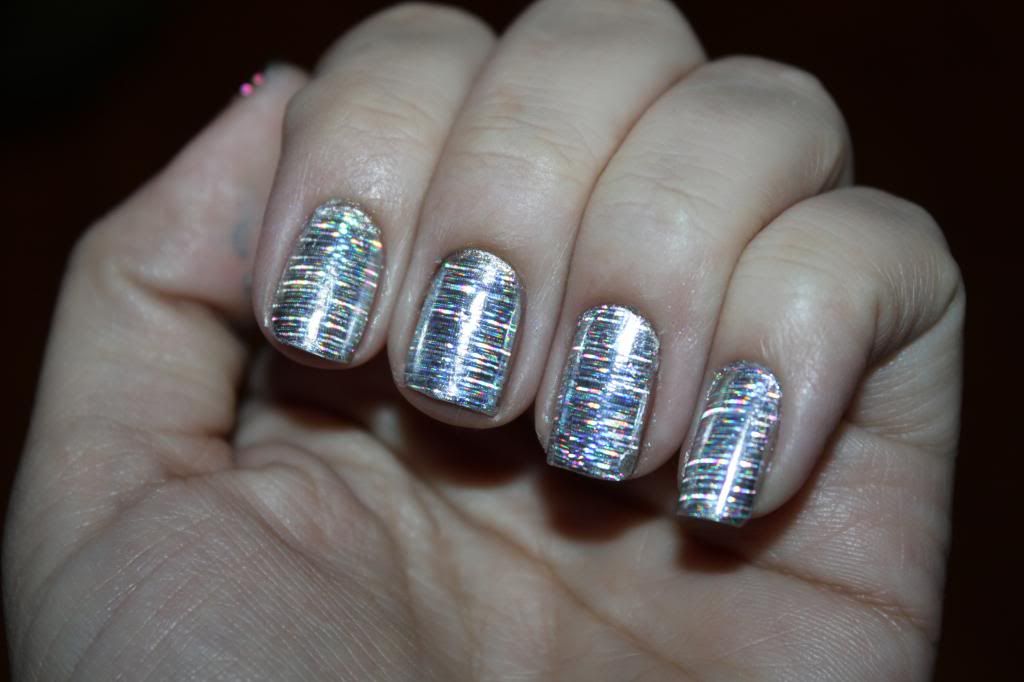
Hello everyone! I'm finally able to have enough time in the day to do a nail design and update the same day! Oh it feels so good to do this again! I have another design that has one of the nail foils that I got off of www.dollarnailart.com . I like the technique used with a like color polish under to foil, to cover up any areas the foil didn't cover. Today I was itching to try one of the silvers I picked up. So I hit my nail with a silver polish, waited for it to dry, and then applied the nail glue. I wanted a minute or so, then applied the foil. I must say my first few times I was impatient for the glue to dry longer, and really messed up the foils. The key is waiting for the glue to dry and get tacky! Onto the foil!
Brand: Sally Hansen
Name: Gone Grey
coats:1
pigment: a metallic deep silver
price:$2.49
Now I didn't take a photo of the polish underneath because it was a thin (and uneven I might add) coat of polish, just to create a base color just in case I didn't get full coverage.
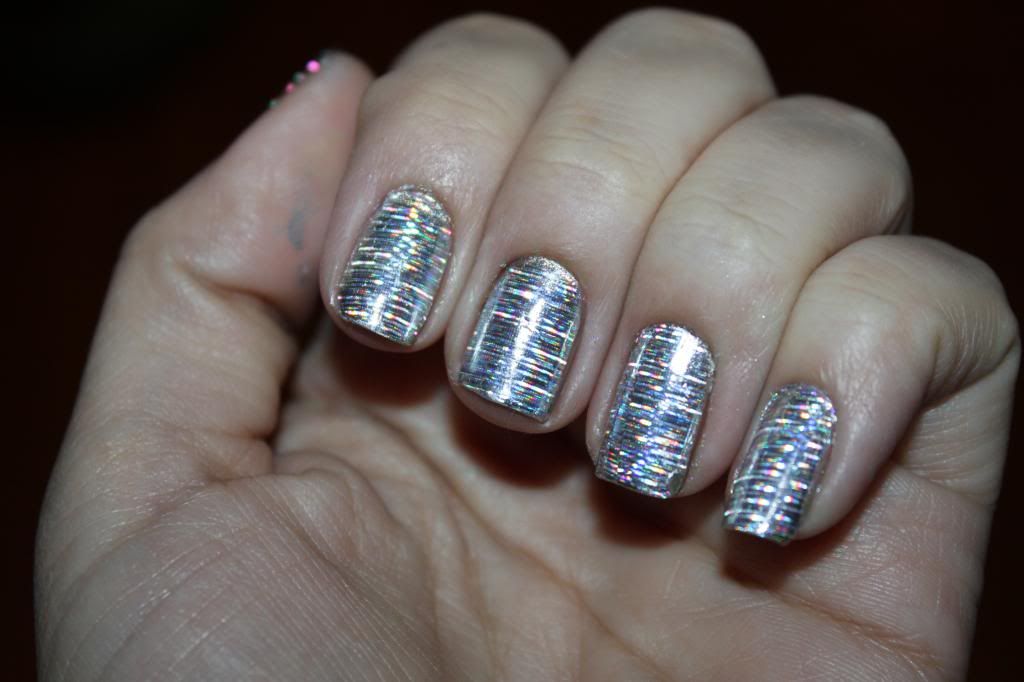
These photos reflect the foils so beautifully! It kinda reminds me of a tv screen when the cable goes out, except a little nicer to look at. The key to protecting the foil after application is a generous top coat. Not shiny or matte, just a simple top coat. You want to gently apply to polish, kinda dab it on. The foil reacts to the polish, but dries flat. Over all, after a few times trying this nail technique out I really like it! It creates such a unique look and is a really great price! This look would be awesome for a night on the town, a special event or even just wanting to try something different and eye catching!
Bah, one of the best nail accessory purchases I have made! I can't wait to try more out! I hope you try them out too!
No comments:
Post a Comment